In this part, we will learn How to learn embroidery designs, how the complete design is ready.
In part 1 we have learned about all the tools of Embroidery design program, now in part 2 we will learn to draw design. In this design course, each and every tool has been explained very simply with a photo.
Lesson 2: In this lesson, we will learn to do design drawing. Now we have learned completely about leaf and branch (run), so now we have to make a complete design by using both of them. So let’s learn how the design is made.
How are designs and how are they made?
Designs are made in different types such as multi work (only thread), multi and sequin work, code dory and multi and sequin work. First of all we will learn about multi design. If you want to learn quickly, then you should practice more and more of all the above tools.

So you can see that our very beautiful design above is ready. And in that we have used maximum tools in it.
I have given all the details as above I have used input A, complex fill, triple run, single run, mirror, motif fill, star, satin stitch, tatami stitch, stem stitch, jedge effect.
How to do Design Drawing?
There are also 4 colors in this, tell one thing in this, use as little color as possible so that your material money is also saved and the machine gets more production and profit also increases. The more the color, the less will be the production of the machine. So you also have to make a design using all these tools, the more you practice, the sooner you will get the result. I put a picture of one or two designs below so that you can understand more.

So here the work of making our design is completed. In this, I have done small part drawing so that you can understand, later you have to make the complete design, according to the machine aria, both its length and width have to be made complete. Length (1000 mm to 1150 mm) and width (250, 300, 400) have to be kept according to the machine. It has to be set according to the aria and photograph of both the machines.
How to know how it will run in the machine.
Now you must be thinking that if there are more heads in the machine then how will it work. So let’s learn from an image

In this way you have to prepare the complete design in one head. As it is seen in the above image that a design is made in a head which is made of 250 aria and I have kept its height up to 1000 mm.
Now the preview of the same design is visible nearby, how it will actually be made in the cloth, it is showing that means same work will be made in every head, it is called repeat set in machine language and part set is also necessary, otherwise 2 A space will appear in the middle of the head, due to which your design will look distorted. Whenever you make any design, you have to make it by repeating set.
In any design, you have to make the design according to how many repeats you want in one head. So first of all they learn how to set repeat. The design made above is made in the area of 250, but in it you will see repeat total 2, that means one repeat of the flower is of 125 mm, the same one is copied and pasted next to it, then the same part is reversely pasted on top of it. In this way we have to make all the designs. On the one hand, let’s learn by taking the example of lace.

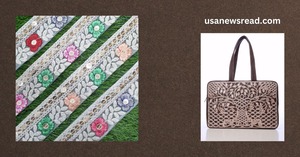
In the above image, we have made a lace design, in that you can see how to add repeat. This design is of 250 area and 1 part (flower) is of 50, so it will be 50*5=250. So in this way, in how many parts you have to make any design, you have to calculate it accordingly.
Above I have repeat count means you have to see how many repeats you have to write 4-5-6, then write the size of the flower and the distance so that the same part will appear nearby. Then in offset also you count no. You can give so that the color of the repeat will look different and you can correct the flower properly. Now I am giving you the picture of the whole lace so that you will get complete understanding.

two heads mixed repeat
In this image, complete part ready will be seen which is made in 250 aria. When your part of one flower is correct, then you have to change the repeat again like I have done in the image above so that the whole design of your 250 aria is ready.
I have used Array tools to match the complete repeat of 250, it happens with them that when one of your flower becomes perfect, then you have to start repeat (shortcut key W), then select the flower, then select Array tools and select it horizontally. The line which is visible is to put 6 count there. 6 because the repeat of 5 can be matched correctly. So you have to set it by zooming above the nearest repeat by 6 and then click on the space evenly across tools, then the gap between all will be set correctly.
Now you have to make a lot of lace and other different designs like this and also practice.

How to make design on top of Sketch
Now let’s make 1-2 designs from the sketch also. You can draw the design on top of it even after making a sketch of the design. You will understand by looking at the image given below.


You have to make sketch according to aria and then go to file in wilcom and click scan option and scan it. You must have a scanner to scan the design. If the scanned image is not visible on the screen, then show bitmap tools (shortcut key D) has to be OK which I have shown in the image above. Then you can make a design on that drawing. So start practicing and learn.
If you know how to make sketches yourself, then you can earn money even by selling them, nowadays there is a lot of demand for sketch makers in the market.
In this way, you can also make the design on the top of the cloth by scanning it. If you make any cloth by scanning, then the width and height which is visible in the lower corner, near the option of 100% will be visible on the top and bottom, in both of them you have to press enter by writing the same 105 above and below, so that the image you have I have scanned it, it will be a little bigger.
Then when you make the design, then your repeat can be found correctly. Later that image has to be locked (shortcut key K) so that it is easy for you to make the design. By locking that scan file will not move from there and we can work on it properly.
If you press for unlock (shortcut key shift K), then the scan file will be unlocked. By the way, option has also been given in wilcom, you can see. To hide the scan (shortcut key D) is to be pressed and to bring it back the same will remain the same. You will be able to learn from the image given below.

While drawing the design, if you do not see anything correct in the stitch, then you have to do it correctly in this way. Which will be known from the image below.

It is visible in the upper leaf that a broken stitch is visible in one leaf, it is called a jump, what happens to it, when your work starts on the machine, then due to this jump, the thread will be cut repeatedly, where The jump will appear from that, so when we make a design with the help of these tools, then we have to close these tools by selecting the leaf.
If the effect of shortening is visible in the second leaf, then by selecting the leaf in that too, those tools have to be closed. In my opinion, whenever you make any design, then close both those tools beforehand so that you do not have to close them again and again, it will save your time and your speed will also increase in making the design.
One more special thing, you should know that whenever you start any design, first of all you decide the run (2.5, 3, 4, 5 mm), the spacing of the stitch (0.40, 0.60, 0.70). Correct the option beforehand so that you do not have to change it again and again.
Now here our lesson 2 ends, now you have to learn what is the process of learning all this.
You have learned to do design drawing, but now how will it work on this machine.
Conclusion
This lesson is most important because till now you were making design in computer but now you have to learn to run it in machine, then we call that process punching and it is also called cut paste. First of all, we know what is punching and what is it called. Punching means that whatever design you have made, it runs in the actual machine as it is, so to make it run correctly, we have to punch it. Means one leaf is formed here and the other is formed away from them. Let’s learn from the next lesson.
FAQ-How to learn embroidery designs easily
How can I learn embroidery myself?
If you want to learn how to design on computer for free, then the entire course on the usanewsread.com site has been taught in 3 parts, in which how to use all the tools, how to draw and finally how to run on the machine, easy methods on this. has been explained.
What is the easiest computer embroidery to learn?
Today, wilcom ES is the best way to learn the easiest, in which every type of design can be made very easily.
embroidery classes near me with fees
You do not need to go anywhere else to learn computer embroidery course because in usanewsread.com this entire course is taught absolutely free of cost and when it comes to fees, it is charged differently worldwide.
computer embroidery design course
Wilcom ES is one of the best courses to learn computer embroidery design which is taught absolutely free on usanewsread.com and the tools for each stitch are well explained.
machine embroidery classes near me
If you do not have the money for fees, then be absolutely relaxed because this entire course has been taught for free on usanewsread.com and you can easily learn it sitting at home.
